Task 2: Create Router Configurations and Practice Git Operations
Introduction
This task focuses on repetition of the most important Git commands in the lab. You will create router configurations, inspect changes, stage them deliberately, and commit them in logical increments. The repetition is intentional because strong Git habits are central to successful GitOps.
Goal
Create the initial router configurations and build confidence with git status, git diff, git add, git commit, git fetch, and git pull.
Task Dependencies
Complete Task 1 before starting this task.
Diagram
flowchart LR
    A[Edit config files] --> B[git status]
    B --> C[git diff]
    C --> D[git add]
    D --> E[git commit]
    E --> F[git push or local history review]
Steps
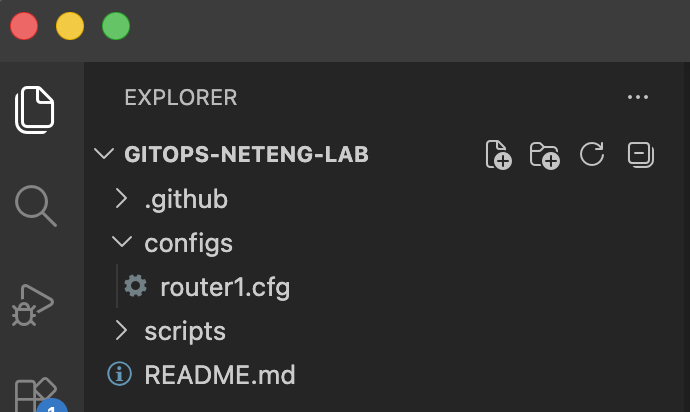
Step 1: Create the router1.cfg file
In VS Code in the integrated terminal, create the first router configuration file:
touch configs/router1.cfg
PowerShell:
wsl touchconfigs/router1.cfg
This creates the file that will store the desired state for R1. Creating the file first separates the act of building the project structure from the act of defining network configuration.
Step 2: Add the R1 configuration
Add the following content to configs/router1.cfg:
hostname R1
!
interface Loopback0
 ip address 1.1.1.1 255.255.255.255
 no shutdown
!
interface GigabitEthernet0/0
 description Link to R2
 ip address 10.0.12.1 255.255.255.0
 no shutdown
!
interface GigabitEthernet0/1
 description Link to R3
 ip address 10.0.13.1 255.255.255.0
 no shutdown
!
router bgp 65001
 bgp log-neighbor-changes
 network 1.1.1.1 mask 255.255.255.255
 neighbor 10.0.12.2 remote-as 65002
 neighbor 10.0.13.3 remote-as 65003
!
end
This configuration gives R1 its hostname, interface addressing, loopback interface, and BGP relationships. It is the first example of desired network state being stored in Git, and later in the lab this file is sent through the CML API to update the matching router in the existing lab.
Step 3: Save the R1 configuration file
Save configs/router1.cfg in Visual Studio Code.
Saving the file ensures Git can detect the full configuration in the next steps.
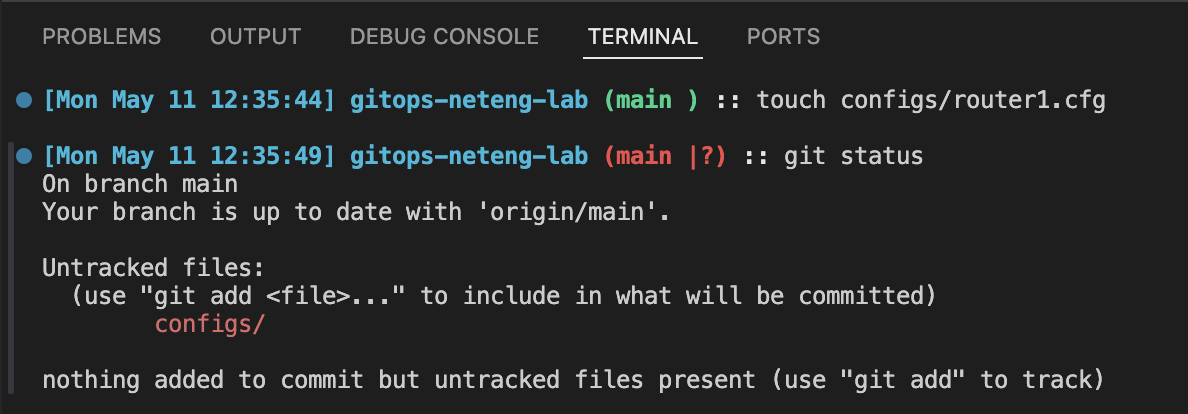
Step 4: Check the repository state
View the current Git status:
git status
This command shows that configs/router1.cfg has changed. It answers a basic but important question: what does Git know has happened in the working tree?
Step 5: Stage only the first router configuration
Add the updated file to the staging area:
git add configs/router1.cfg
This command stages only router1.cfg, which keeps the change set small and focused. In GitOps workflows, targeted commits are easier to review and troubleshoot than large mixed commits.
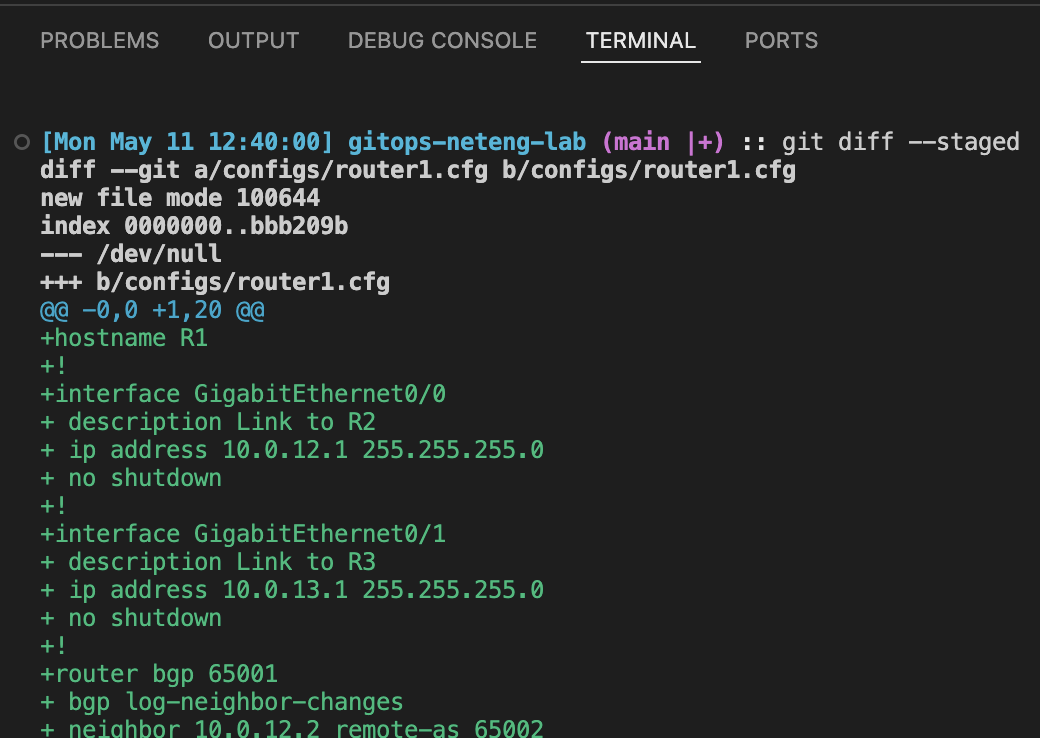
Step 6: Inspect the staged router configuration
Review the line-by-line difference for the staged file:
git diff --staged
For a brand-new file, git diff by itself does not show the content before the file is staged because Git still treats it as untracked. git diff --staged shows the exact configuration that is now prepared for the next commit.
Press Q to exit the diff view
Step 7: Commit the first router configuration
Create a commit for the staged change:
git commit -m "Add initial configuration for router1"
This commit records the first real network state in the repository history. The commit message explains exactly what was introduced.

Step 8: Create the router2.cfg file
Create the second router configuration file:
touch configs/router2.cfg
PowerShell:
wsl touchconfigs/router2.cfg
This creates the file that will define the desired state for R2.
Step 9: Add the R2 configuration
Add the following content to configs/router2.cfg:
hostname R2
!
interface Loopback0
 description BGP Router ID / Advertised Network
 ip address 2.2.2.2 255.255.255.255
 no shutdown
!
interface GigabitEthernet0/0
 description Link to R1
 ip address 10.0.12.2 255.255.255.0
 no shutdown
!
interface GigabitEthernet0/1
 description Link to R3
 ip address 10.0.23.2 255.255.255.0
 no shutdown
!
router bgp 65002
 bgp log-neighbor-changes
 network 2.2.2.2 mask 255.255.255.255
 neighbor 10.0.12.1 remote-as 65001
 neighbor 10.0.23.3 remote-as 65003
!
end
This configuration defines R2's links to R1 and R3 and places it in AS 65002. Like the R1 file, it will later be sent through the deployment workflow to update the matching node in CML.
Step 10: Save the R2 configuration file
Save configs/router2.cfg in Visual Studio Code.
This makes sure the configuration is written to disk before you continue.
Step 11: Create the router3.cfg file
Create the third router configuration file:
touch configs/router3.cfg
PowerShell:
wsl touchconfigs/router3.cfg
This creates the file that will define the desired state for R3.
Step 12: Add the R3 configuration
Add the following content to configs/router3.cfg:
hostname R3
!
interface Loopback0
 description BGP Router ID / Advertised Network
 ip address 3.3.3.3 255.255.255.255
 no shutdown
!
interface GigabitEthernet0/0
 description Link to R1
 ip address 10.0.13.3 255.255.255.0
 no shutdown
!
interface GigabitEthernet0/1
 description Link to R2
 ip address 10.0.23.3 255.255.255.0
 no shutdown
!
router bgp 65003
 bgp log-neighbor-changes
 network 3.3.3.3 mask 255.255.255.255
 neighbor 10.0.13.1 remote-as 65001
 neighbor 10.0.23.2 remote-as 65002
!
end
This completes the three-router configuration set that matches the topology used later in the lab. Together, these three files define the per-router startup state that the deployment pipeline will apply to the existing CML environment.
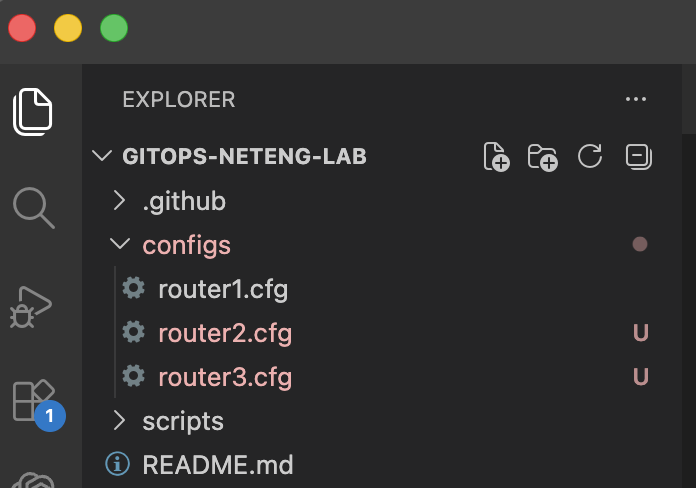
Step 13: Save the R3 configuration file
Save configs/router3.cfg in Visual Studio Code.
At this point, all three router configuration files should be stored locally and ready for Git to review.
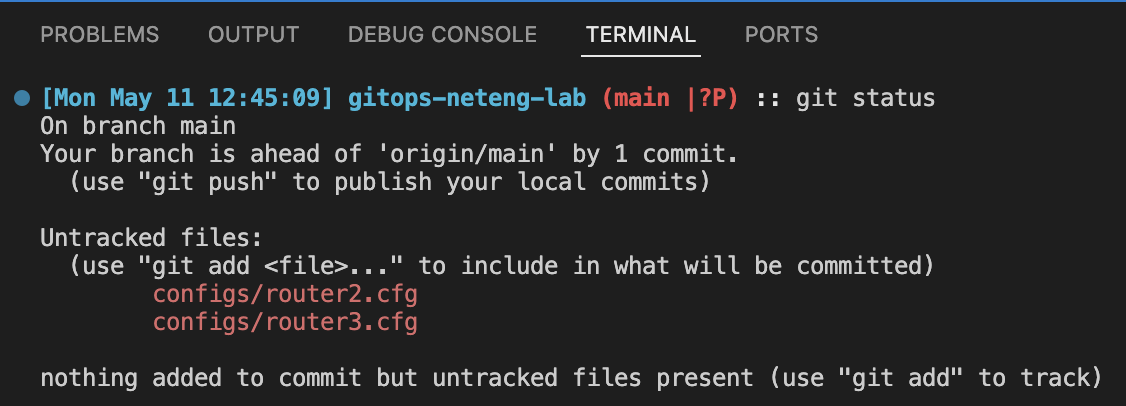
Step 14: Check status again
Review the repository state after adding the two new files:
git status
This confirms which files are new or modified before you inspect the actual content differences.
Step 15: Stage router2 and router3
Add the two new configurations to the staging area:
git add configs/router2.cfg configs/router3.cfg
This stages only the files related to the second configuration update. Grouping related router changes together keeps the history readable.
Note
git add . can be used to add all files to the staging area
Step 16: Confirm the staged state
Run git status one more time:
git status
At this point, the files should appear as staged changes ready to commit. This status check helps reinforce the difference between working changes and staged changes.

Step 17: Review the staged router configurations
Inspect the staged changes:
git diff --staged
This view lets you confirm that the router definitions, addressing, and BGP neighbors for R2 and R3 match the intended design before you record them in Git history.
Press Q to exit the diff view
Step 18: Commit the second configuration update
Record the staged router files in Git history:
git commit -m "Add initial configurations for router2 and router3"
Now the repository contains the initial desired state for all three routers.

Step 19: Make a small follow-up change
In configs/router1.cfg, add a Loopback description to read BGP Router ID / Advertised Network
hostname R1
!
interface Loopback0
 description BGP Router ID / Advertised Network
 ip address 1.1.1.1 255.255.255.255
 no shutdown
!
interface GigabitEthernet0/0
 description Link to Router 2 R2
 ip address 10.0.12.1 255.255.255.0
 no shutdown
!
interface GigabitEthernet0/1
 description Link to Router 3 R3
 ip address 10.0.13.1 255.255.255.0
 no shutdown
!
router bgp 65001
 bgp log-neighbor-changes
 network 1.1.1.1 mask 255.255.255.255
 neighbor 10.0.12.2 remote-as 65002
 neighbor 10.0.13.3 remote-as 65003
!
end
A small follow-up edit is useful because it mirrors real operational work, where engineers refine or correct an existing configuration rather than always building from scratch.
Step 20: Save the follow-up change
Save the file after making the follow-up change.
Saving the edit ensures the next status and diff commands show the change you intended to make.
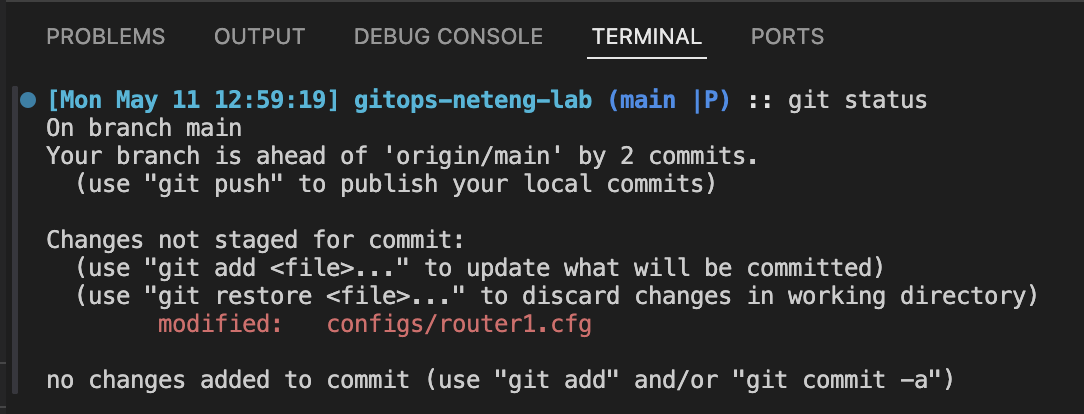
Step 21: Check status after the follow-up change
git status
This shows which file changed after your small edit and helps you develop the habit of checking repository state immediately after making a modification. Notice the modified keyword.
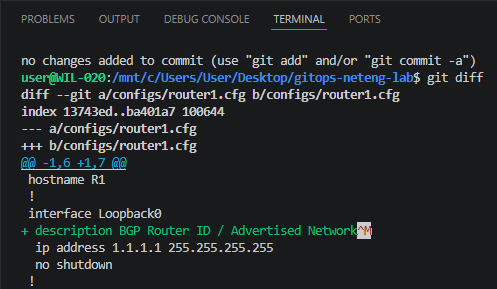
Step 22: Review the new diff
git diff
This confirms the precise impact of the small change. In daily Git work, this is often the moment where you catch a typo or an unintended edit before it becomes part of a commit.
Step 23: Stage the follow-up change
Add the updated router configuration to the staging area:
git add .
This stages the small refinement you just made. Staging the file now keeps the next commit focused on a single, easy-to-understand improvement.
Step 24: Commit the follow-up change
Record the refined configuration in Git history:
git commit -m "Refine router1 interface description"
This commit captures a realistic day-two change instead of an initial build step. It helps reinforce that Git is useful not only for creating new files, but also for recording small improvements over time.
Step 25: Push the updated history to the remote repository
If you configured a remote in Task 1, publish the new commit:
git push origin main
This sends the latest local commit to the remote repository. After the push completes, the remote history will include both the original router configurations and the small follow-up refinement.
Step 26: Navigate to the GitHub repository
Open the gitops-neteng-lab GitHub repository in your browser.
- In the browser, type https://github.com or simple click the hyperlink to open in a new tab.
- Once you are logged in, click on your profile in the top right corner of the webpage.
- From the drop down menu, click
Your Repositories - Click the
gitops-neteng-labGitHub repository
This brings you to the remote copy of the project. In the next step, you will make confirm that all files are visible in the remote repository
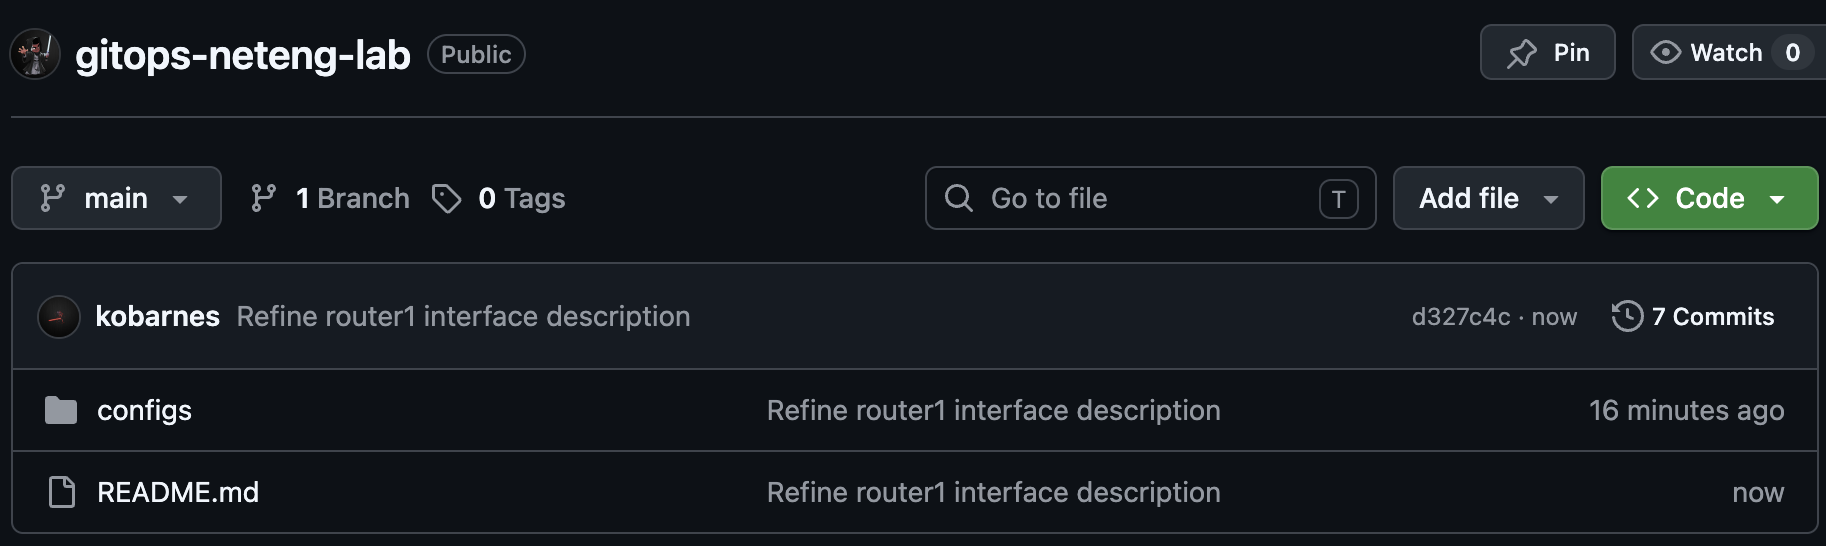
Step 27: Confirm the router files appear in GitHub
Review the GitHub repository and confirm that the configs directory is now visible and that it contains router1.cfg, router2.cfg, and router3.cfg.
This check confirms that the earlier push was successful and that the router configuration files now exist in the remote repository as well as on your local machine.
Step 28: Make a small change in GitHub
- Click
README.mdin the GitHub repository - Click the edit button, The pencil icon to the right of the screen

- Add a short line such as
Repository synchronized through Git and GitHub. - Click the green
Commit changesbutton
- Click the green
Commit changesbutton in the pop-up window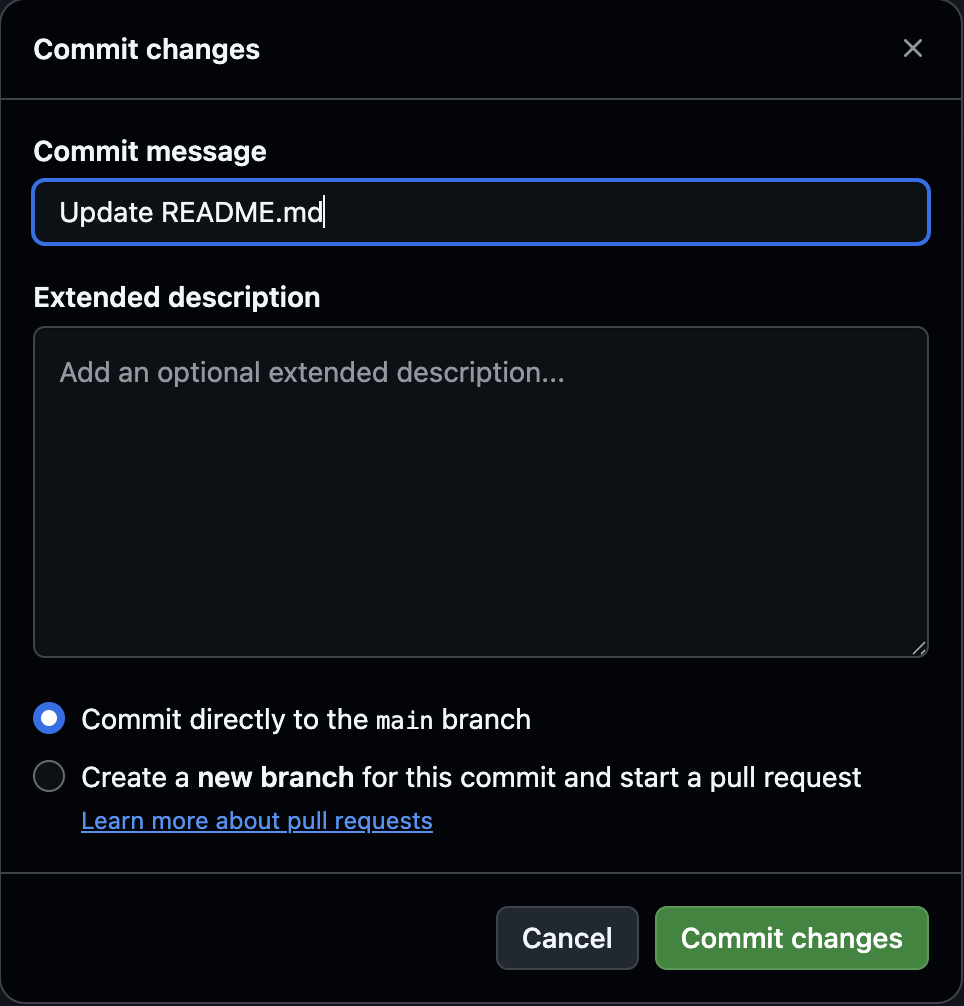
This creates a real remote update in the repository history. Having a remote-only change makes the next git fetch and git pull steps more meaningful because you will be syncing an actual update instead of running those commands with no visible effect.
Step 29: Fetch remote updates if a remote exists
Return to Visual Studio Code and, if you configured a remote in Task 1, run:
git fetch
git fetch contacts the remote repository and downloads any new commits or branch updates, but it does not change your working branch. This makes it a safe way to see that new remote history exists before you bring it into your local branch.
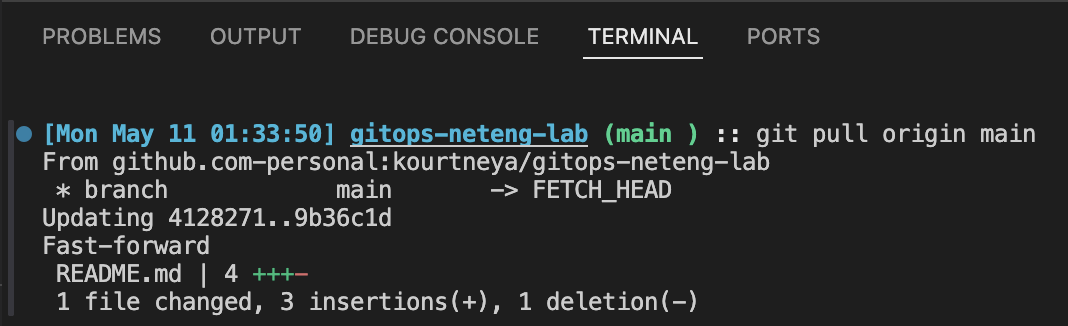
Step 30: Pull remote updates if needed
If you configured a remote in Task 1, run:
git pull origin main
git pull brings the remote README update into your current branch by fetching and then integrating it. This is useful when you want your local branch to stay synchronized with the shared repository.
Step 31: Confirm the README update in Visual Studio Code
Open README.md in Visual Studio Code and confirm that the new line you added in GitHub is now present locally.
Seeing the update in the local file confirms that the git fetch and git pull steps successfully brought the remote change into your working copy.
Why This Matters
GitOps depends on small, traceable, reviewable changes. When learners build the habit of checking status, reviewing diffs, and staging intentionally, they are much less likely to send unclear or risky changes into automation.
Final Summary
You created the router configurations and practiced the Git command loop that supports day-to-day NetDevOps work. These configuration files become the input for Task 3, where you will validate and package them, and later they will be used to update the existing routers in CML.